How to Implement Guardrails for AWS EKS
Today marked the first ever AWS re:Inforce security conference, and Styra was well represented. Paavan Mistry from AWS took the stage to walk through an EKS Security session with Synamedia, wherein they talked about the great responsibility organizations have over their Kubernetes environments.
Paavan showed how Styra can be used to enforce policy guardrails, to minimize both operational and security risks across clusters. Indeed, without guardrails, it is all too easy to run into one of the many documented (or undocumented) Kubernetes failure stories. To paraphrase both Paavan and Peter Parker: With great power comes great responsibility and the ability to introduce great errors on accident!
To that end, I want to take a moment to show that setting up guardrails to eliminate risk is easier than you might think. At Styra, we provide solutions to define, enforce, and validate policies/guardrails across all clusters within an organization for coherence and compliance—and to reduce risk as well. Styra lets DevOps teams enforce guardrails that allow, deny, or change K8s objects as they are being defined. Styra’s solution is a control plane that runs on top of our Open Policy Agent, which acts as an admission controller. (If you are not yet familiar with admission controllers or Open Policy Agent, I recommend checking those out then coming back to this blog.)
However, we can indeed avoid the pitfalls of those that have come before. Below I’ll demonstrate how Styra can be used to implement guardrails for an AWS EKS environment. Of course, Styra supports almost all popular managed Kubernetes (EKS, GKE, AKS, OpenShift, so on.) as well as standard Kubernetes (versions 1.9 & above) running in any environment, but for now, we’ll use EKS as our example.
Step 1: Create a Kubernetes system and install OPA as an admission controller webhook
When you sign up for Styra, it is straightforward to integrate your clusters running on any public cloud provider or in standard Kubernetes environments.
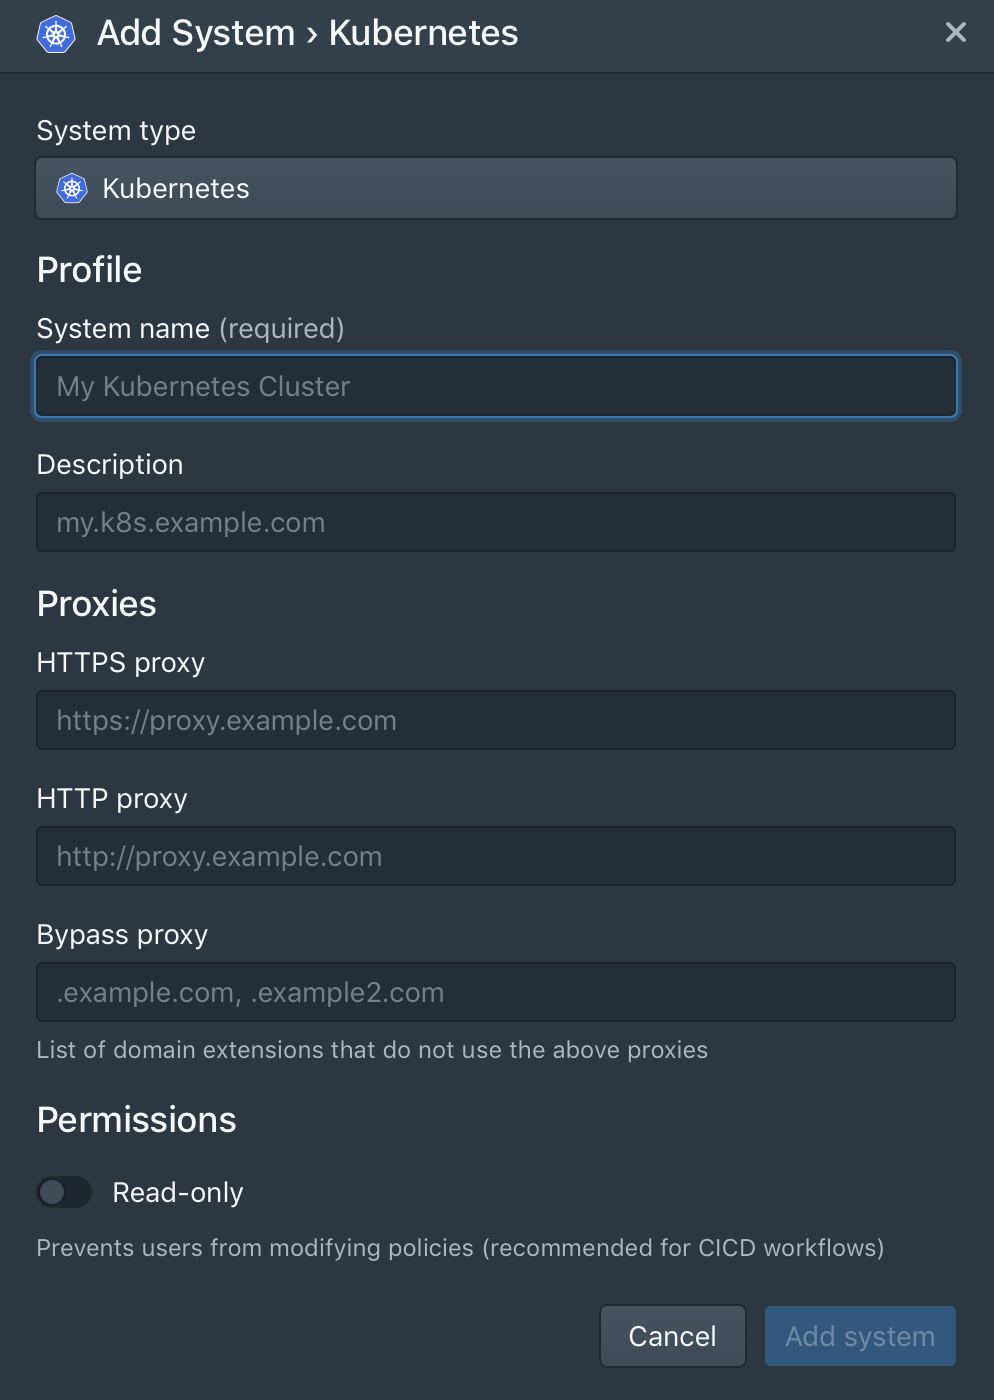
In the control plane, click + next to the Systems on the left-hand side. Then configure:
System name: a human-friendly name, so you remember which cluster is which
Description: more details about this cluster
Read-only: set to true if you want to stop people from editing the policy in the GUI
If you’re using Styra’s SaaS version, and have a web proxy between your terminal and the SaaS service, you can fill in the additional fields under Proxies.
After system creation, you’ll see two ways of installing components (helm or kubectl) onto your cluster in the styra-system namespace. Before running the install commands, ensure Kubectl context is set to the right environment by running kubectl cluster-info.

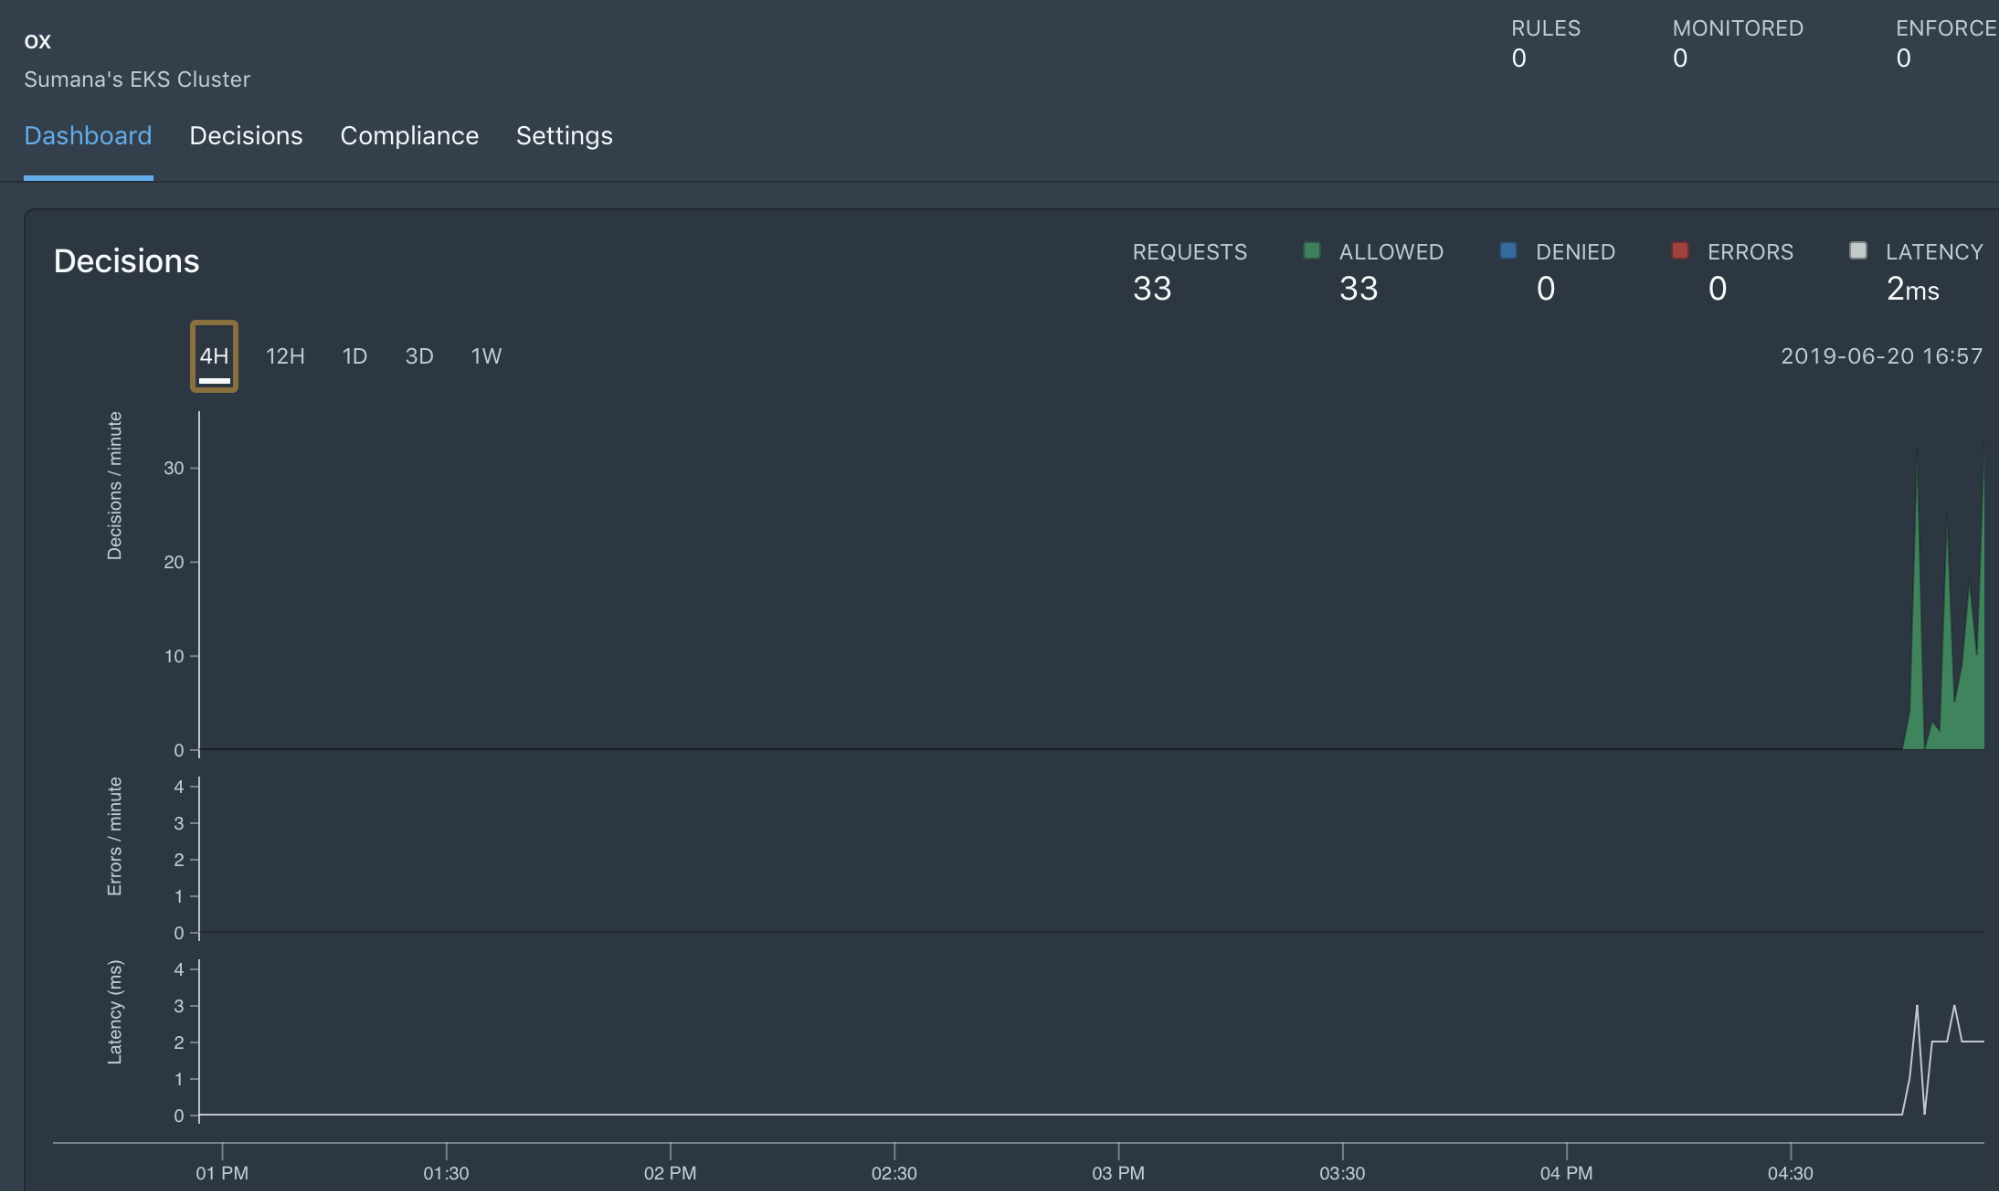
As you start copying the install commands for execution, Styra starts listening for OPA and datasource components to phone home. Once the connection is established, decision activity begins on the dashboard for that new system.
Step 2: Create your first policy for auditing and enforcement
Now is the time to define what policies you want to put in place for this cluster. These can be a security policy, or simple operation policies to eliminate rework or human error. The sky is the limit here! You may already have a set of rules you want to implement, but if not, take a look at the included set of pre-built rules. Most of our customers start with the following:
- Ensure images come from a trusted registry
- Require all resources to include specified labels or annotations
- Require specified CPU and memory resource requirements
- Block container privileged mode
- Block ingress conflicts
- Block latest image tag
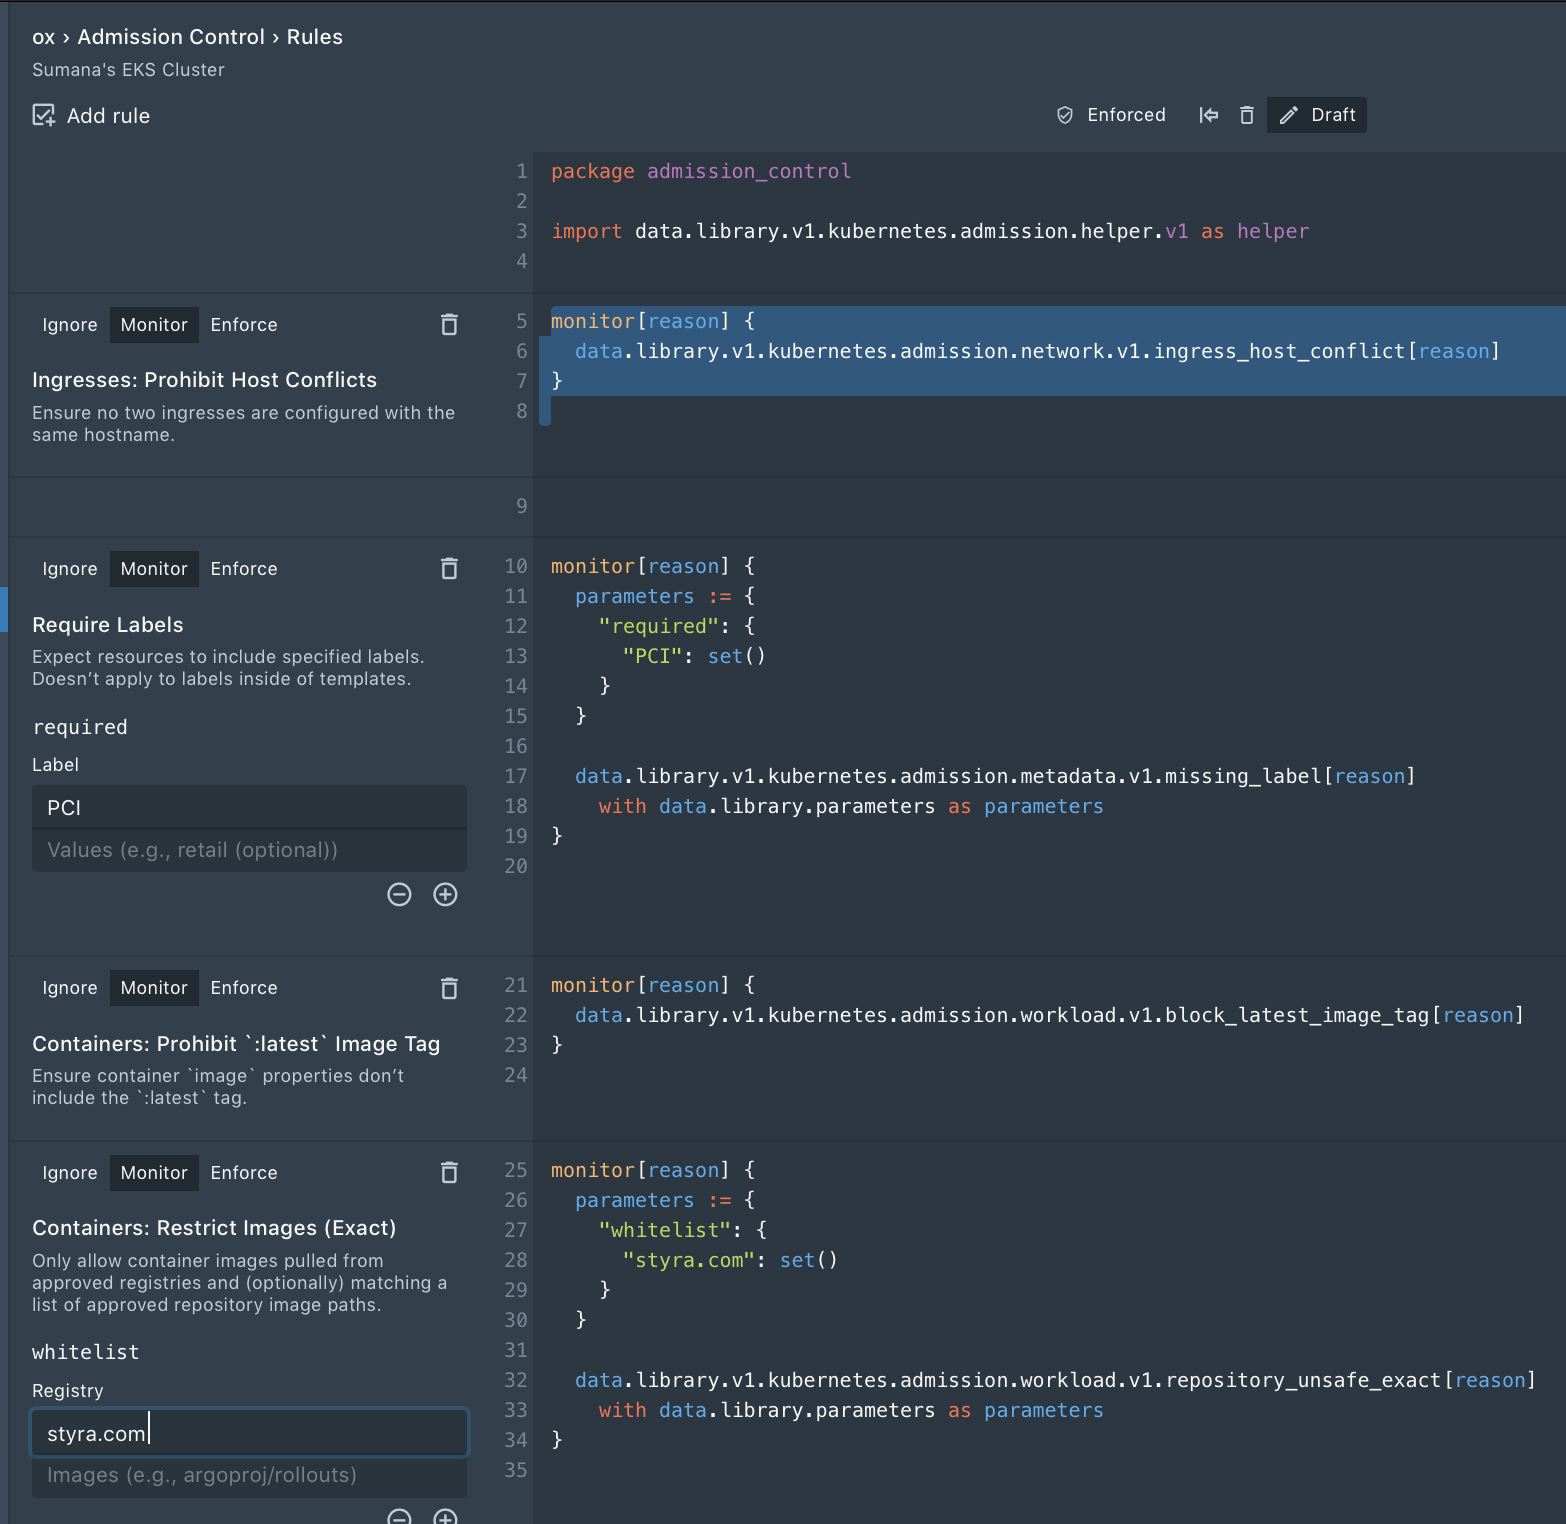
Each rule can be set to enforce, monitor, or ignore.
- By default, when a new rule is added, it is set to monitor, so you can see where violations occur, but you don’t risk breaking CICD by enforcing rules right away.
- When in monitor, Styra periodically audits cluster resources and surfaces violations so you can see what’s outside of policy rules.
- Once all the violations are drained, the rule can be toggled from monitor to enforce, to ensure no new workloads are out of compliance.
- The ignore state causes Styra to ignore the rule entirely—typically used when creating and testing new rules, or during troubleshooting.
Step 3: Analyze the impact of the policy change
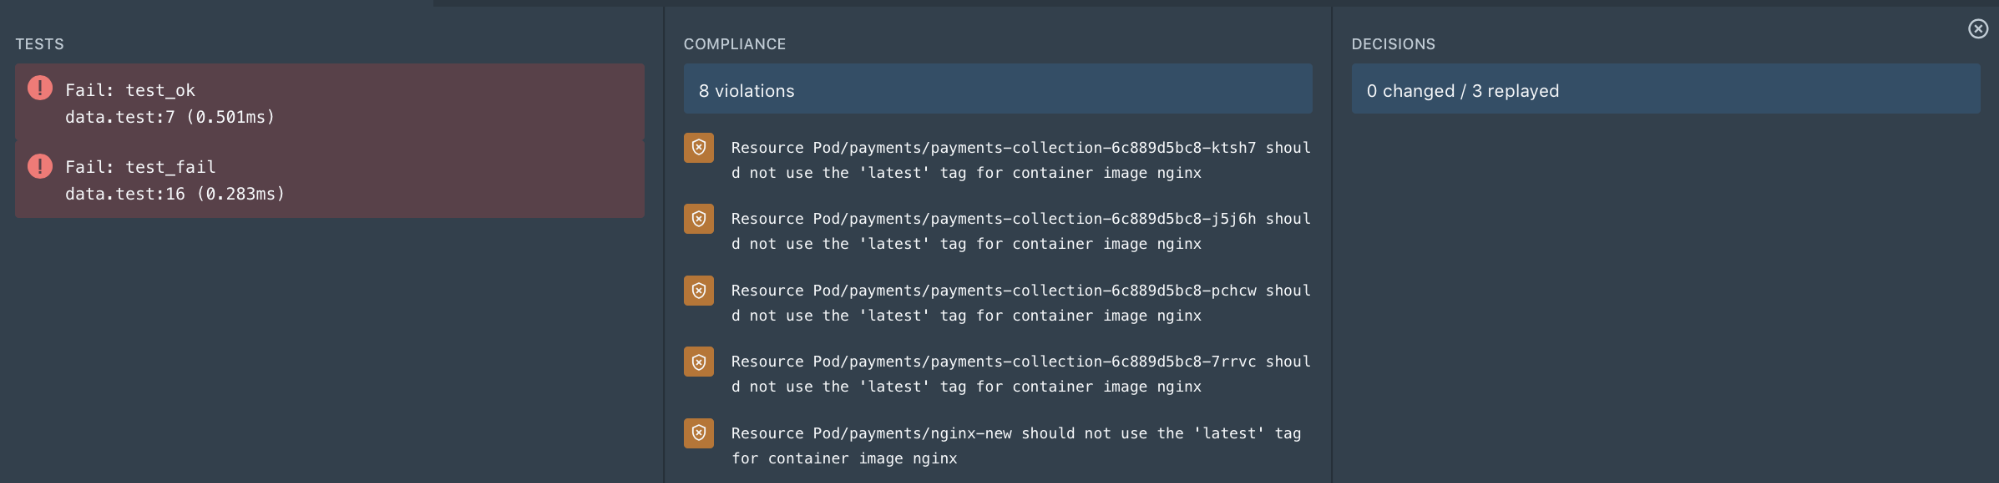
Styra lets you validate the impact of any change before enforcing it on running clusters. Clicking Validate in the policy editor provides the following results in the validation pane:
- Tests: Results from unit tests that are defined under system > tests. Unit tests are predominantly useful for custom rules, as all built-in rules have already been tested.
- Compliance: see the running resources in your current cluster that violate your policy
- Decisions: see which previous admission control decisions would have been changed if the current policy were enforced.
Step 4: Distribute policies for enforcement
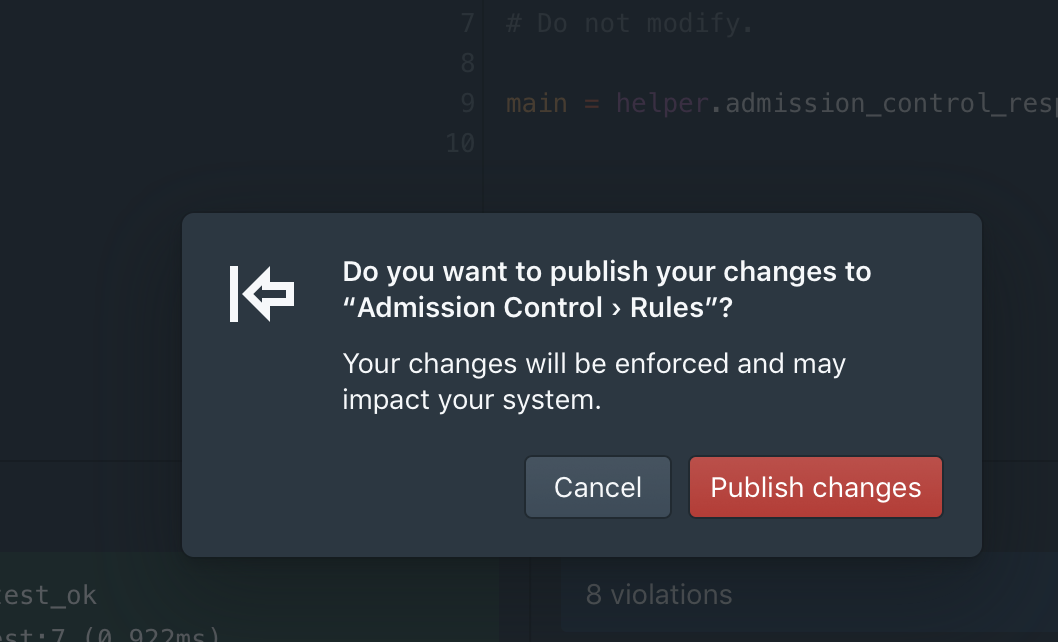
Once you are happy with the impact analysis results, and you are ready to enforce the policy, toggle the policy state from monitor to enforce, and then click publish. (If Styra is configured to store policies in Git, you can also publish the policy first to Git, so it goes through peer review/change management, etc.)
Once the policy is enforced, any kubectl command that pushes non-compliant resources is denied, with an appropriate error message.
Sumanas-Laptop:yamlfiles sumana$ k create -n payments -f payments-web.yaml
Error from server (Resource Deployment/payments/payments-collection should not use
the 'latest' tag for container image nginx): error when creating "payments-web.yaml":
admission webhook "validating-webhook.openpolicyagent.org" denied the request:
Resource Deployment/payments/payments-collection should not use the
'latest' tag for container image ngin
Step 5: Monitor decisions
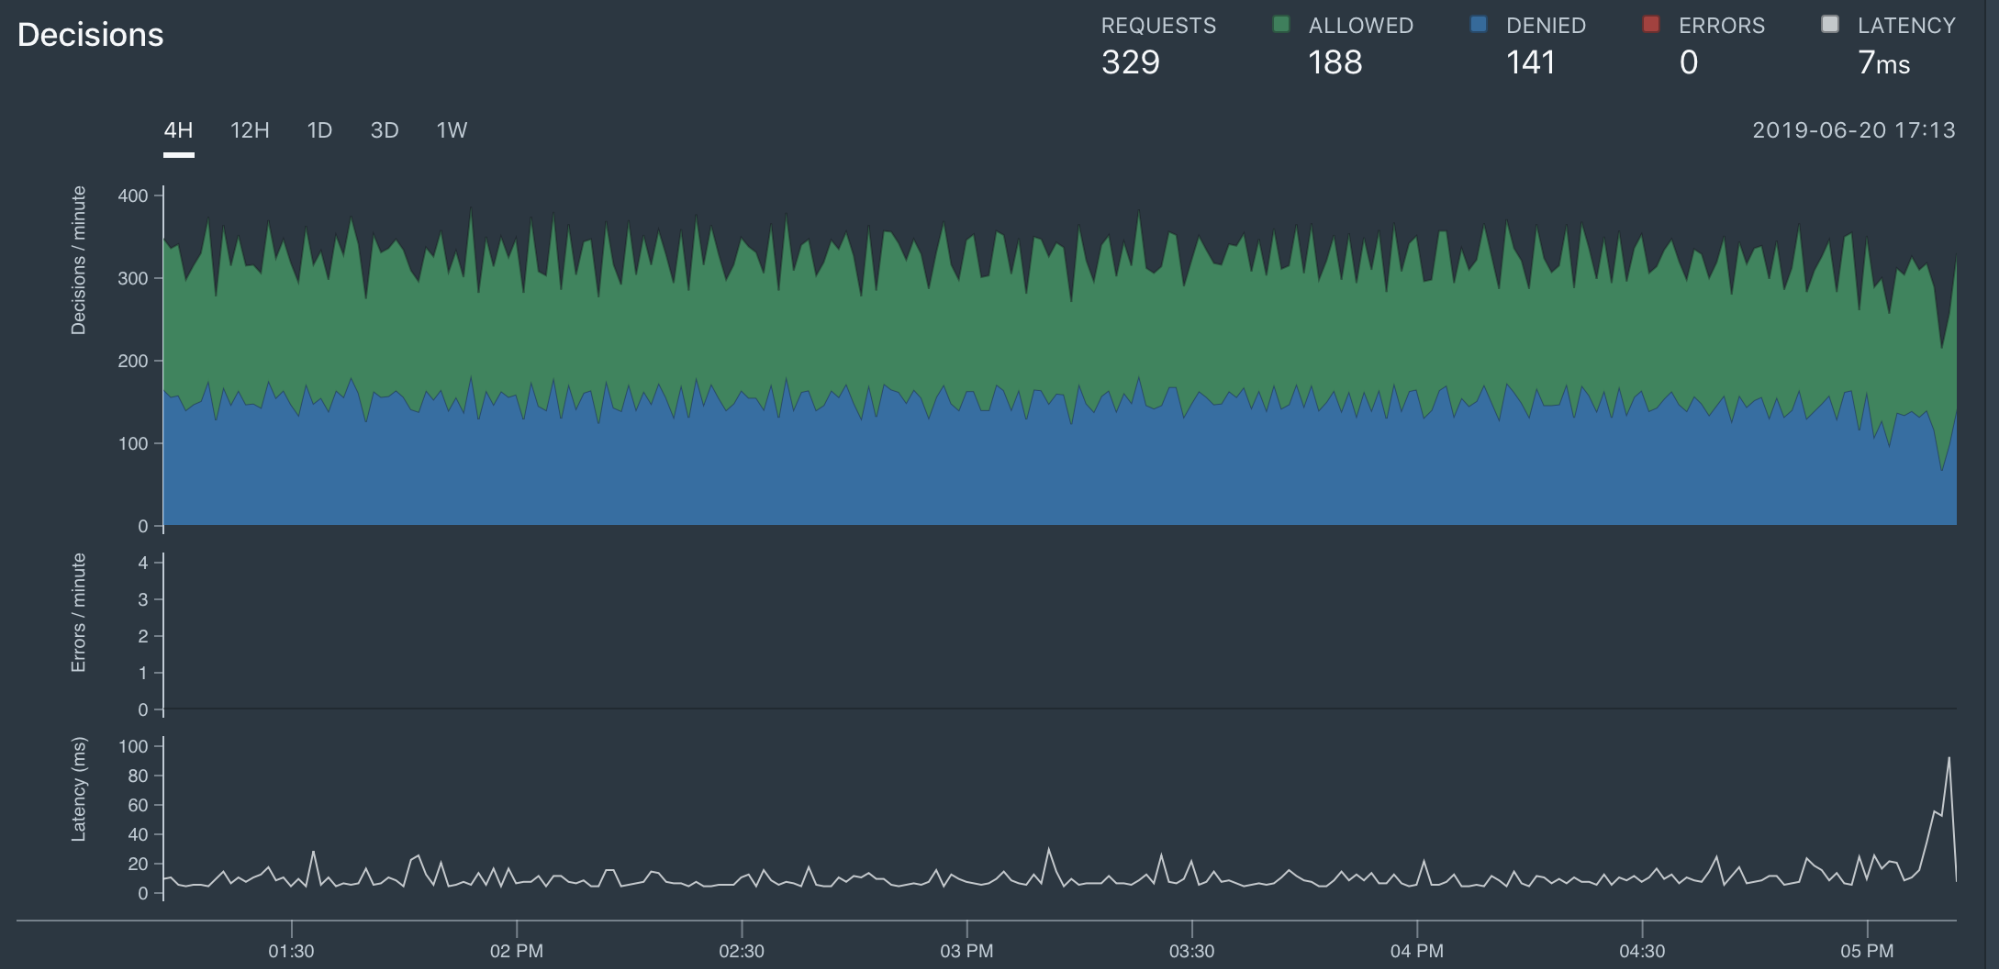
All the decisions Styra makes—both the denials and allows—are collected in the Styra service for compliance and auditing purposes. The dashboards show the activity in the form of time series graphs. These include:
- Total Requests: the total number of decisions OPA made as an admission controller
- Denied: the number of requests that OPA denies
- Allowed: the number of requests that OPA allowed
- Errors: the number of errors during policy evaluation (where OPA returned an error instead of allow or deny), e.g. divide by zero
- Latency: the time required for OPA to make a decision
The decision log shows all the requests Styra made, and it includes the rich details about the resource object that was passed as input, as well as the status of the decision based on that input.


The Compliance screen provides the list of existing resources which are violating current policy.

Your first guardrails are just five steps away
In just five simple steps, you can define, enforce, and validate K8s policies/guardrails, and monitor for compliance across not just one cluster but all the clusters within your organization. However, you don’t have to take my word for it. Sign up today and see for yourself!